This pillow was featured in the recent Half-Hexie ruler "How-to" video seen >>HERE
A lapped zipper is a great way to finish a pillow back, hiding the zipper teeth and making it easy to change out the pillowform, especially for laundering, etc.


Project: DECORATIVE PILLOW
Supplies:
* Pillow top, 18'' square
* Backing, 1 Fat Quarter (approx 18" x 21")
* Backing, 1 Fat Quarter (approx 18" x 21")
* 20'' Polyester zipper
(I like my zipper a couple inches longer so I can clip off the metal hardware.)
* 2 @ 2-1/4" x width of fabric strips for binding
* 18" to 20" Pillow Form

My Mom had a collection of a bunch of notions in her sewing room. These old zippers recently came to live in my sewing room. Perfect!
Instructions:
1) Cut Backing.
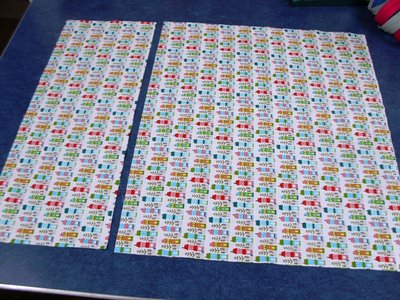
Measure your pillow top. Backing pieces will be cut the same width as the pillow top. Determine the length of your backing pieces by adding 2" to account for a 1-inch lap. This would apply to any size pillow. I cut my backing piece at 18" x 20". Then I made a slice where I wanted the zipper to go, and cut two sections measuring 18" x 5, and 18" x 15".

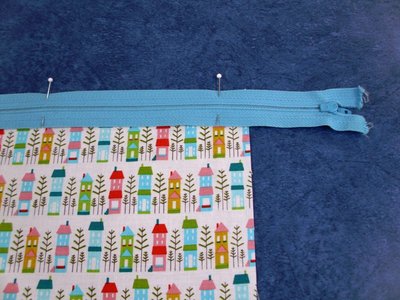
APPLY zipper to top of larger backing piece. With right sides together (zipper face down; fabric right side up), center and align the edge of the zipper tape with the upper edge of the fabric as pictured; PIN in place.

Zig-zag to finish the raw edges and basically baste the zipper to the fabric.

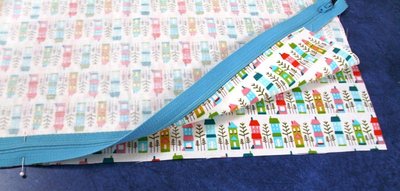
Once that step is complete, flip the fabric back and fold right along the edge of the zipper teeth; PIN into place. Change your presser foot to the ZIPPER FOOT, then STITCH through all layers, about 1/8" away from zipper teeth.

2) APPLY Zipper to remaining back piece.

Switch the presser foot back to the regular foot, then Zig-Zag stitch the edge as before.

3) FORM LAP (flap, overlap, etc.)

Align top edge of backing with top edge of pillow to form the lap or overlap. Without catching the pillow front, pin the flap into place to prepare for top stitching.

Switch to the Zipper foot again, and STITCH in place. The foot should glide alongside the zipper teeth if top-stitching on the right side of fabric, or move pins to the back side and stitch on the wrong side so you can see the zipper.

FINISH. Align backing wrong sides together with pillow top and PIN. Stitch together, or use a Zig-Zag stitch to secure edges and prepare for binding.

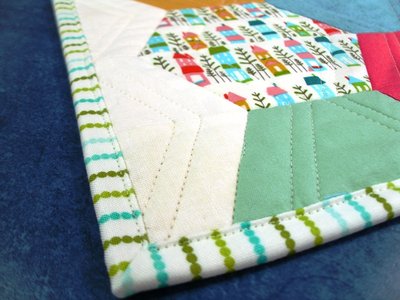
BIND the edges of the pillow. Need a refresher? Watch this VIDEO tutorial for Machine Binding, or here's a step-by-step Binding Basics TUTORIAL.


This pillow top used 25 5" squares featuring So Happy Together fabrics by Deena Rutter along with RBD Basic Shades and Solids, cut with the 5" Hexie-Half ruler. One 2-1/2" x width of fabric strip was used for the side finishing pieces. Hope you enjoyed this tutorial - Zippers truly can be our friend! Our next zipper we'll tackle in this series? INVISIBLE ZIPPERS!!
Until then, Happy Quilting!
Comments from RBD
ZIP IT! Lesson I - Easy Exposed Zipper Installation
ZIP IT! Lesson III - Easy Invisible Zipper Installation
ZIP IT! Lesson III - Easy Invisible Zipper Installation


July 01st, 2013 at 4:18 p.m.
July 02nd, 2013 at 12:35 p.m.
July 13th, 2013 at 3:04 p.m.
November 11th, 2013 at 7:28 p.m.